 Perhaps it is just as ubiquitous in other parts of the country, but I’ve never stumbled across more pieces of sun-dried wood on beaches than I have along the shores of Lake Erie. Sometimes the pieces are small, acting almost like daggers under beach towels. Other times the pieces are giant tangles of fallen trees, washed up from god-knows-where, like this massive piece on Headlands Beach in Mentor, at right.
Last summer I smuggled a great block of driftwood from Edgewater Beach in Cleveland. For months it sat in the trunk of my car, and currently resides aloof in my apartment, not doing much of anything aside from adding to the great clutter that is good design (or so I think). Stephen also is a collector of driftwood, although he has found some functional use for his pieces, such as a small table for the porch or as a holder of fireplace pokers and brooms. I argue this is not so much his creativity, but rather, his innate ability to find more useful pieces of broken hunks of wood. It is a skill!
BEFORE + AFTER
With his recent move, came the need to decorate (after all the horribleness of unpacking dishes, building furniture, etc). In the new house, windows and other architectural elements punctuate many of the walls, but there was a particularly large, expansive wall in the living room that begged for a statement piece. With so much furniture and knick-knacks filling the space already, despite the wall’s ability to hold a collection of photo frames and paintings, it seemed the wall begged for little intervention.
Enter the driftwood.
Flanked by soft whites and warm, dark wood, the driftwood piece at once stands out as an unusual decoration while receding into the background space unobtrusively.
How did I get this oblong, protruding, twisted piece of wood on the wall? READ ON!
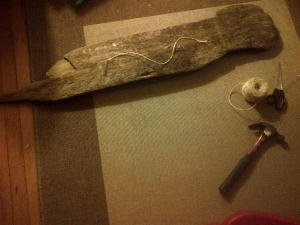
MATERIALS
Hammer
1′-2′ of twine
(4) 1/2″ nails (ie, tiny!)
(1) 2″ or 3″ nail (ie large!)
Driftwood
DOING IT
1. Identify how you’d like to position the driftwood on the wall. Vertical? Horizontal? Which way is up?
2. Hammer one small nail 2/3 of the way into the wood. Position the nail 1/3 of the way down the length of the wood.
3. Tie a loose sailor’s knot with the twine and loop it around the head of the nail. Pull to tighten the rope around the nail. Double knot the rope. If there is an extremely long tail, snip it, if not forgettaboutit. You’ll never see it once it’s hung.
4. Place a second small nail 2/3 of the way into the wood, 1/3 of the way from the opposite end of the wood (Essentially, you’re looking to hang the one nail that will go into the wall in the center of the wood).
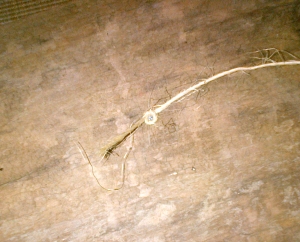
 5. Lay the string across the wood and loop around the second nail. Tie a knot, leaving a bit of slack in the twine – enough so that you can create a third loop at the center of the rope for the large nail. Secure the second knot around the second nail. Cut the twine off of the roll.
6. Tie the third knot in the center of the rope, using up all the slack.
7. Use the two remaining small nails to tack down the twine at points between this center knot and the two initial nails. This will help ensure the wood stays tight to the wall and does not pull or bounce away from it, which could damage the wall finish.
8. Slip the large nail through the center loop and have a second set of hands on hand to help hoist the driftwood up against the wall. Hammer into place. Using just this one nail, you’ll be able to hang any strangely formed piece of wood (lightweight wood, like driftwood, that is!). In fact, in less than ten easy steps you’ve created a focal point that is sure to amaze, as the wood appears to float away from the wall like magic.

 I’m really quite proud of this inventive way to hang unusually shaped objects and think it must have had something to do with the awesome food I enjoyed earlier, including Pittsburgh’s Fuel and Fuddle’s amazing smashed-potato pizza and homemade veggie quesadillas.


